In this guide
- What Order Should You Set Up GoHighLevel In?
- Phase 1: How Do You Set Up the Account Foundation?
- Phase 2: How Do You Set Up Email and Phone So Messages Actually Arrive?
- Phase 3: Which Integrations Should You Connect First?
- Phase 4: How Should You Organize Contact Data in GoHighLevel?
- Phase 5: How Do You Build the Pipeline, Calendars and Lead Capture?
- Phase 6: How Do You Set Up Conversations, the Mobile App and Reviews?
- What Are the First 3 Workflows to Build in GoHighLevel?
- How Do You Test GoHighLevel Before Going Live?
- What Are the Most Common GoHighLevel Setup Mistakes?
- Should You Set Up GoHighLevel Yourself or Get Help?
- Frequently Asked Questions About Setting Up GoHighLevel
- Get Your GoHighLevel Account Working From Day One
To set up GoHighLevel, work inside a sub-account and go in this order: business profile and time zone, users, a dedicated email sending domain, a phone number with A2P registration, integrations, custom fields and tags, your pipeline, calendars, forms and a first page, then three core workflows. Test it all with a dummy lead before real leads arrive.
Here is the scene we walk into most weeks. A business owner signed up ten days ago, built a funnel first because it was the fun part, switched on Facebook ads, and leads started arriving. The texts are not delivering because A2P registration was never filed. The emails go out from a shared domain and land in spam. The appointment reminders fire in the middle of the night because the time zone was left on the default. Nothing is wrong with the software. The setup simply happened in the wrong order.
This guide walks you through the order we follow on every build, from an empty account to the first lead handled automatically. Each step has the current menu path, what to enter and the mistakes we fix most often. It comes from the iBoostin team’s hands-on builds for service businesses and agencies. If you are new to the platform, start with what GoHighLevel is and how it works, then come back here.
Key takeaways
- Do almost all of your setup inside a sub-account. The agency view is for billing, branding and creating sub-accounts.
- Set the business profile and time zone first, because workflows, calendars and reminders all read from them.
- Start the email sending domain and A2P 10DLC registration early. Both depend on outside parties and can hold up your launch.
- Build your data structure (custom fields, custom values, tags and pipeline stages) before you build forms, calendars and workflows.
- Launch with three workflows only: speed to lead, missed call text back and appointment reminders. Test each one as a fake lead first.
What Order Should You Set Up GoHighLevel In?
The right order is foundation first, then delivery, then data, then the things leads actually see, and automation last. Every later step depends on an earlier one. A workflow cannot text a lead if the phone number is not registered, and a form cannot fill a custom field that does not exist yet. When you build in this order, you rarely have to go back and redo work.
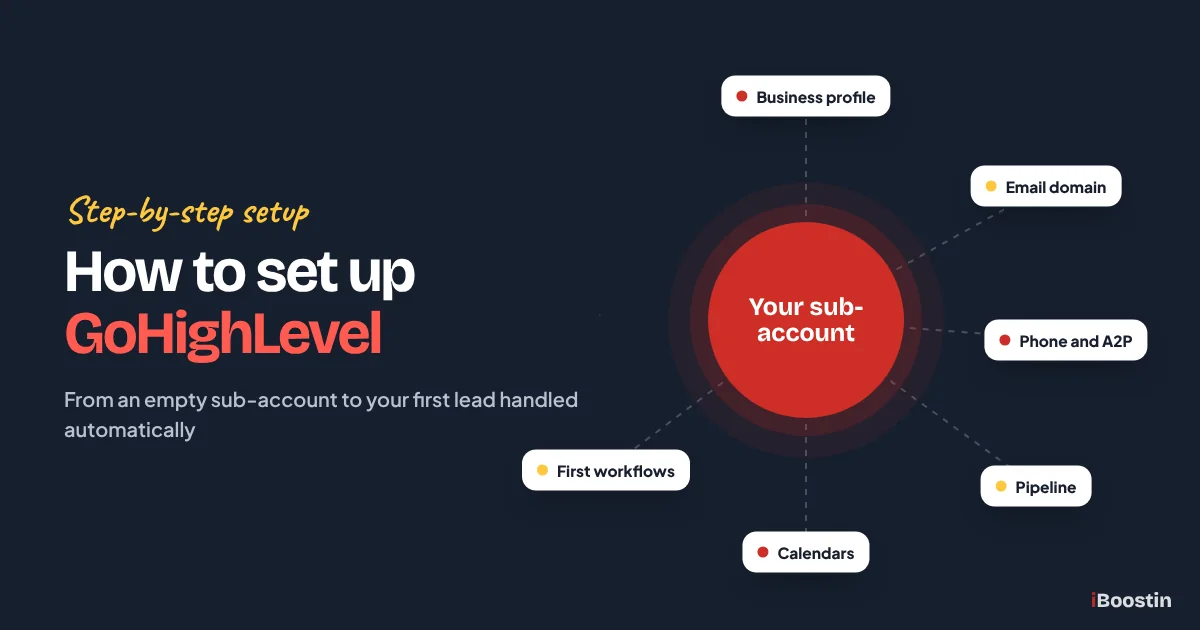
Here is the sequence this guide follows. It is the same checklist we use internally, grouped into six phases so you can work through it over a few sessions instead of one long weekend.
| Phase | What you set up | Why it comes here |
|---|---|---|
| 1. Foundation | Sub-account, business profile, time zone, users | Everything else reads from these settings |
| 2. Delivery | Email sending domain, phone number, A2P 10DLC | Outside approval takes time, so start early |
| 3. Integrations | Google, Facebook and Instagram, personal calendars, payments | Connected channels feed the inbox and calendars |
| 4. Data | Custom fields, custom values, tags | Forms and workflows need somewhere to store data |
| 5. Lead flow | Pipeline, calendars, forms, first funnel or page | The path a lead travels from first click to booking |
| 6. Automation | Inbox, mobile app, reviews, first 3 workflows, testing | Automation only works once the pieces exist |
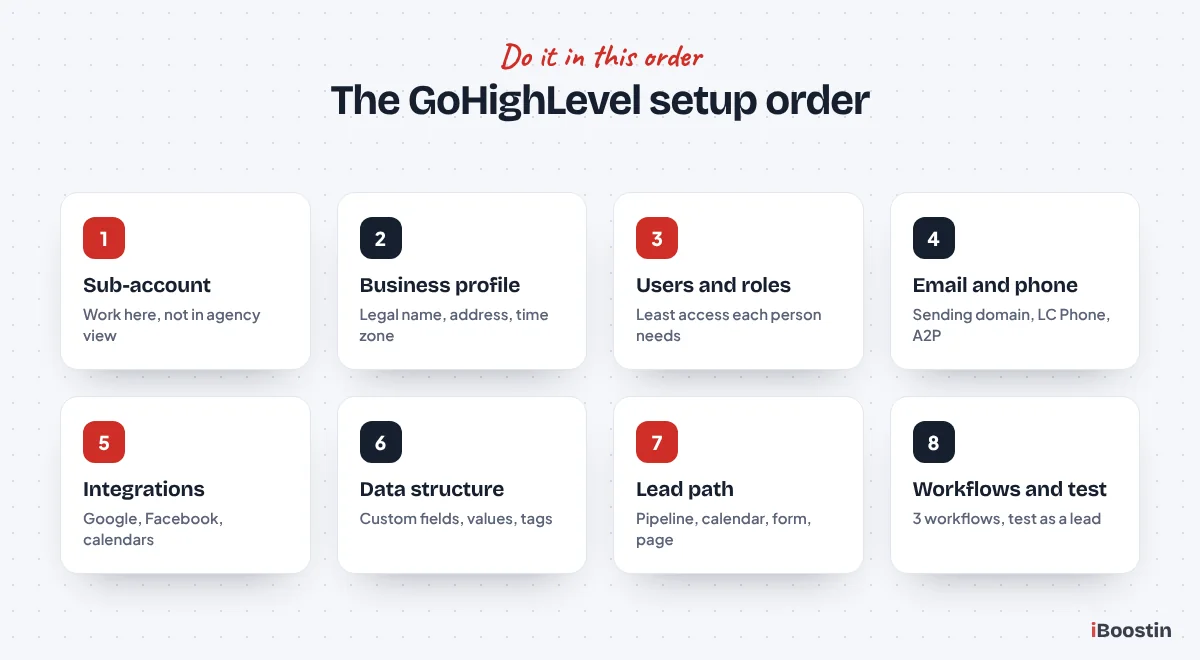
If you inherited a snapshot or a half-built account, use the same order as an audit list. Walk each phase and confirm it is done properly before you trust the workflows that sit on top of it.
Phase 1: How Do You Set Up the Account Foundation?
The foundation is the boring part that decides whether everything else works. It covers where you work, who your business is in the system and who on your team can see what. Plan for an hour or two here, and do not skip ahead.
Step 1: Understand agency view vs sub-account and create your sub-account
Every HighLevel login has two levels. The agency view is the top level, where you manage billing, branding, snapshots and the list of sub-accounts. The sub-account is where contacts, conversations, pipelines, calendars, workflows, funnels and phone numbers live. Even if you only run one business, you still get an agency view with one sub-account inside it, and that sub-account is where you will spend almost all of your time.
The most common confusion we see is people building things in the wrong place, or hunting for a menu that only exists in the other view. A good rule: if it touches a lead, it belongs in the sub-account. If it touches billing, white label branding or which features a client can access, it belongs in the agency view. You switch between them with the account switcher at the top of the left menu, which shows options such as Switch to Agency View or Switch to Sub-Account depending on where you are.
To create your sub-account:
- In the agency view, click Sub-Accounts in the left menu.
- Click the button to create a new sub-account.
- Choose a blank setup, or a snapshot if you already have a proven one.
- Enter the business name, address, phone, website and time zone, then save.
- Open the new sub-account with Switch to Sub-Account.
| Agency view | Sub-account | |
|---|---|---|
| Main job | Manage the business of using HighLevel | Run the business that gets the leads |
| What lives there | Billing, snapshots, branding, sub-account list | Contacts, inbox, pipelines, calendars, workflows |
| Who should use it | Owner or agency admin only | Owner, staff and clients |
| Typical mistake | Trying to build funnels here | Giving staff agency access they do not need |
Step 2: Fill in the business profile and time zone
The business profile is the first page under Settings in the sub-account, and it matters more than it looks. It holds your logo, business name, email, phone, website, physical address, time zone, platform language, legal business details and the authorized representative used during compliance and carrier reviews. Your A2P registration, your email footers and many custom values pull from here, so typos travel everywhere.
Pay special attention to the time zone. It sits in the Business Physical Address section as Business Time Zone, and it shapes when workflow time windows open, when reminders go out and how dates are shown. In the accounts we fix, a wrong time zone is behind a surprising share of “reminders sent at the wrong time” complaints. Also check the contact deduplication preferences while you are here, so a lead who fills two forms does not become two contacts.
- Open the sub-account and click Settings at the bottom of the left menu.
- Click Business Profile.
- Complete General Information, Business Physical Address (including Business Time Zone) and Business Information.
- Enter the legal business name exactly as it appears on your tax records, because A2P review compares them.
- Add the Authorized Representative, review the deduplication settings and save each section.
Pro tip: Each user also has a personal time zone in their own profile. If your team works across time zones, check both, because some pages display in the user’s own time zone while automations follow the business settings.
Step 3: Add users, roles and permissions
Add your team now, before you build, so you can assign calendars, conversations and opportunities to real people later. In current accounts the path is Settings, then Users (some accounts still show the older label My Staff). Each user gets a role of Admin or User, and then module-level permissions that switch areas such as contacts, opportunities, marketing or settings on and off.
Keep admin access tight. Owners and the person who maintains the account should be admins. Front desk staff and sales reps usually need the conversations inbox, contacts, calendars and opportunities, and nothing in settings. If a rep should only see their own leads, turn on Only Assigned Data for that user so they see the contacts, opportunities and appointments assigned to them.
- Go to Settings, then Users (or My Staff).
- Click Add User (some versions say Add Employee).
- Enter the name, email and phone, and set the role to Admin or User.
- Open Roles & Permissions and switch off modules the person does not need.
- Turn on Only Assigned Data for reps who should see only their own records, then save.
Common mistake: Agencies often add a client’s staff as agency users so they can “see everything”. Give client staff an account-level user on their own sub-account instead. Agency access lets someone see other clients’ data and change billing.
Phase 2: How Do You Set Up Email and Phone So Messages Actually Arrive?
This is the most error-prone phase of the whole setup, and the one where outside parties (DNS providers, inbox providers and phone carriers) get a say. Start it on day one, even if you finish the rest of the build later, because verification and carrier review can take days. Our post on why GoHighLevel emails land in spam covers fixes for accounts that are already sending badly.
Step 4: Set up a dedicated email sending domain
Out of the box, HighLevel can send email from a shared domain. That is fine for a quick test, but your messages then share reputation with other senders, and some inboxes show “sent via” or “on behalf of” text. A dedicated sending domain lets you send from your own address, builds your own reputation and is the single biggest deliverability fix we make in new accounts.
Use a subdomain that is not used for anything else, such as mg.yourbusiness.com or mail.yourbusiness.com. HighLevel recommends a subdomain because it protects the reputation of your main domain, where your normal staff email lives. If your sending subdomain ever gets a bad reputation from a campaign, your everyday inbox on the root domain is not dragged down with it.
- In the sub-account, go to Settings, then Email Services.
- Open the Dedicated Domain and IP tab.
- Click Add Domain and enter your sending subdomain.
- Let HighLevel configure DNS automatically if your provider supports it, or copy the records into your DNS host by hand.
- Click verify. DNS can take up to 24 hours to update, so recheck later if a record shows unverified.
Common mistake: If the subdomain already has MX or SPF records pointing to another email service, verification fails with a “domain already pointing to email server” style error. Pick a clean subdomain rather than reusing one that another tool already sends from.
SPF, DKIM and DMARC in plain English
These three DNS records tell inbox providers that your emails are really from you. SPF lists which servers may send for your domain. DKIM adds a digital signature to each email so the receiver can check it was not changed on the way. DMARC tells inboxes what to do when an email fails those checks, and where to send reports about it. Gmail and Yahoo now expect bulk senders to have all three in place, and missing records are one of the fastest routes to the spam folder.
When you add a dedicated domain, HighLevel gives you the SPF and DKIM values to publish for that subdomain. DMARC is usually set once on your root domain as a TXT record named _dmarc. For a new setup, start with a monitoring policy (p=none) and a reporting address, watch the reports for a few weeks, and only then move to a stricter policy such as quarantine. Jumping straight to a strict policy can block your own legitimate email from other tools you forgot about.
- SPF: one record per hostname. Never publish two SPF records on the same name; merge them instead.
- DKIM: use the exact value HighLevel shows. Multiple DKIM records for the same sending domain are not supported.
- DMARC: start with p=none, review reports, then tighten.
- Warm up: send to small, engaged groups first before you email a large list from a brand new domain.
Step 5: Get a phone number with LC Phone
LC Phone is HighLevel’s built-in phone system. It gives you local or toll-free numbers for calls and texts, call recording, voicemail, call forwarding and call tracking, all tied to the contact record. You can still connect your own Twilio account in some setups, but for most new accounts LC Phone is simpler because billing and compliance live inside HighLevel. Check current pricing in your account before you buy numbers.
In most accounts the path is Settings, then Phone Numbers. HighLevel is rolling out a redesigned phone settings area with tabs for Phone Numbers, Regulatory Bundles, Messaging, Voice, Trust Center and Additional Settings, so your screen may look slightly different. Buy a number local to your service area, set call forwarding to the phone that should ring, and decide whether calls are recorded and whether a whisper message plays to staff.
- Go to Settings, then Phone Numbers (or Phone System in the new layout).
- Click to add a number and search by area code or city.
- Buy the number, then open its settings.
- Set forwarding to the person or team that answers, and choose the caller ID behavior.
- Make a test call and send a test text to your own mobile.
Pro tip: Outside the US, many countries require a regulatory bundle with a verified business address before you can buy or use a local number. If you serve the UK, the Gulf or Europe, check the Regulatory Bundles tab first so the number purchase does not stall halfway through your build.
Step 6: Register for A2P 10DLC before you start texting
If you text people in the United States from a normal 10-digit local number, carriers require A2P 10DLC registration. Unregistered business texts get filtered or blocked, which means your speed to lead and missed call text back workflows look fine in HighLevel but never reach the lead’s phone. In current accounts the registration lives in the Trust Center, under Settings, then Phone Numbers, then Trust Center.
The flow runs through Business Profile, Brand, Campaign and Consent panels, with a Submission Review screen at the end. Carriers compare your legal name and tax ID against official records, read your sample messages and check how people opt in. Your website needs a privacy policy and terms that mention text messaging, and the form that collects phone numbers needs clear consent wording. Our full guide on how to register for A2P 10DLC in GoHighLevel goes through every field and the reasons registrations get rejected.
- Finish your business profile first, with the exact legal name and address.
- Make sure your website shows a privacy policy, terms and an SMS consent line on your form.
- Go to Settings, then Phone Numbers, then Trust Center.
- Click Start Registration and complete the Brand and Campaign panels.
- Review everything on the Submission Review screen, submit, then keep building while carriers review it.
Common mistake: People submit A2P before the website and form are ready, get rejected, and lose more time than if they had waited one day. Build the privacy policy and consent checkbox first, then register.
Phase 3: Which Integrations Should You Connect First?
Integrations bring outside channels into your inbox and calendars, so connect them before you build anything that depends on them. Most live under Settings, then Integrations. Connect them with the business’s own accounts, not a freelancer’s personal login, so access survives staff changes.
Step 7: Connect Google Business Profile
Connecting Google Business Profile lets you see and reply to Google reviews, pull your review link into review requests and, where available, receive Google messages and call tracking data in HighLevel. It is also the backbone of the reputation setup you will do in Phase 6. The Google account you connect needs Owner or Manager access to the location, and the profile must already be verified with Google.
During connection you choose the location and can switch on GBP call tracking. Confirm the integration shows Connected before you move on. If you manage several locations, double-check you picked the right one, because reviews and messages from the wrong location in your inbox are confusing for staff.
- Go to Settings, then Integrations.
- Find Google Business Profile and click Connect.
- Sign in with a Google account that has Owner or Manager access.
- Select the location, decide on GBP call tracking and click Connect.
- Confirm the status shows Connected.
Step 8: Connect Facebook and Instagram
The Facebook and Instagram integration brings Messenger chats and Instagram DMs into the conversations inbox, and it lets Facebook lead ad submissions create contacts and start workflows. You need admin rights on the Facebook page, and the Instagram account should be a business or creator account linked to that page.
If you run lead ads, map the lead form fields to your HighLevel fields after connecting, so a lead’s answers land in the right custom fields. Then send a test lead through Meta’s lead ad testing tool and confirm the contact appears in HighLevel with every field filled. We see many accounts where the connection works but the field mapping was never done, so leads arrive with only a name.
- Go to Settings, then Integrations.
- Click Connect on Facebook and Instagram and log in as a page admin.
- Select the page and the linked Instagram account and grant the requested permissions.
- Map lead form fields to your HighLevel fields if you use lead ads.
- Send a test message and a test lead, and check both arrive.
Step 9: Connect personal calendars and payments
Each user who takes appointments should connect their own Google or Outlook calendar, so HighLevel can block times when they are already busy and write new bookings into their real calendar. This two-way sync is what stops double bookings. The path is Calendars, then Calendar Settings, then the Connections tab, where each user clicks Add New. Video tools such as Zoom or Google Meet connect under the Video Conferencing tab.
If you take deposits, sell in funnels or send invoices, connect your payment provider now too. Stripe is the most common and connects under Payments, then Integrations. Doing it here means your calendars and funnels can include payment steps when you build them in Phase 5, instead of being rebuilt later.
- Go to Calendars, then Calendar Settings, then Connections.
- Click Add New and connect Google or Outlook.
- Pick the calendar that new bookings write to and the calendars checked for conflicts.
- Connect video conferencing if you run online meetings.
- Connect Stripe under Payments, then Integrations, if you take payments.
Phase 4: How Should You Organize Contact Data in GoHighLevel?
This is the phase most DIY setups skip, and it is why their reporting is a mess six months later. Custom fields, custom values and tags are the filing system for the whole account. Decide on them before you build forms and workflows, and write the list down so your team uses the same names.
Step 10: Create custom fields
Custom fields store information about a contact or opportunity that HighLevel does not track by default, such as service needed, budget range, property type, preferred location or how they heard about you. Forms write into them, workflows branch on them and smart lists filter by them. Without them, useful answers end up buried in notes where no automation can read them.
Go to Settings, then Custom Fields. Use the object selector to choose Contacts or Opportunities, and group related fields into folders so the contact record stays tidy. Choose the field type carefully: a dropdown or radio select is far easier to automate on than free text, because workflows can match exact values. A field’s object type cannot be changed later, so decide whether it belongs on the contact or the opportunity before you create it.
- Go to Settings, then Custom Fields.
- Choose the object (Contacts or Opportunities) at the top.
- Create folders on the Folders tab for related fields.
- Click Create field, choose the type, name it and assign the folder.
- Only create fields you will actually use in a form, a filter or a workflow.
Step 11: Create custom values
Custom values are account-wide settings you can drop into any message, page or email, such as your business name, booking link, review link, office address or main phone line. Instead of typing your booking link into twenty workflows, you insert the custom value once. When the link changes, you update one value and every message updates with it.
Go to Settings, then Custom Values, and click New Custom Value. Each value gets a key generated from its name, and renaming it later does not change the key, so name it well the first time. The difference from custom fields is simple: a custom field changes per contact, while a custom value is the same for everyone in the account. Agencies rely on custom values heavily, because a snapshot loaded into a new client account only needs the values updated to fit the new business.
- Go to Settings, then Custom Values.
- Click New Custom Value.
- Enter a clear name (for example, Booking Link) and the value.
- Group values into folders such as Company, Links and Team.
- Use the value in messages through the custom values picker, not by pasting the raw text.
Step 12: Set up tags with a naming system
Tags are labels on a contact, and they are the most abused feature in HighLevel. Used well, they mark meaningful facts: the lead source, an interest, a status that a workflow needs to see. Used badly, an account ends up with hundreds of near-duplicate tags such as “fb lead”, “FB-Lead” and “facebook leads”, and nobody knows which one workflows depend on.
Manage tags under Settings, then Tags. Before you create any, agree a short naming system with a prefix for each type of tag. Keep tags for things that do not already have a home. If something is a pipeline stage, keep it in the pipeline. If it is a detail with several possible answers, a dropdown custom field is better than a pile of tags.
| Prefix | Use it for | Example |
|---|---|---|
| src | Where the lead came from | src facebook ads |
| int | What they are interested in | int roof replacement |
| status | Short-term state a workflow checks | status nurture |
| wf | Marks a contact for or from a workflow | wf review requested |
| dnd | Do not contact reasons | dnd asked to stop |
Phase 5: How Do You Build the Pipeline, Calendars and Lead Capture?
This phase builds the path a lead actually travels: the page they land on, the form they fill, the calendar they book into and the pipeline stage they sit in. If you want this part planned around your sales process, our GoHighLevel CRM setup service is built around exactly this stage.
Step 13: Build your pipeline and stages
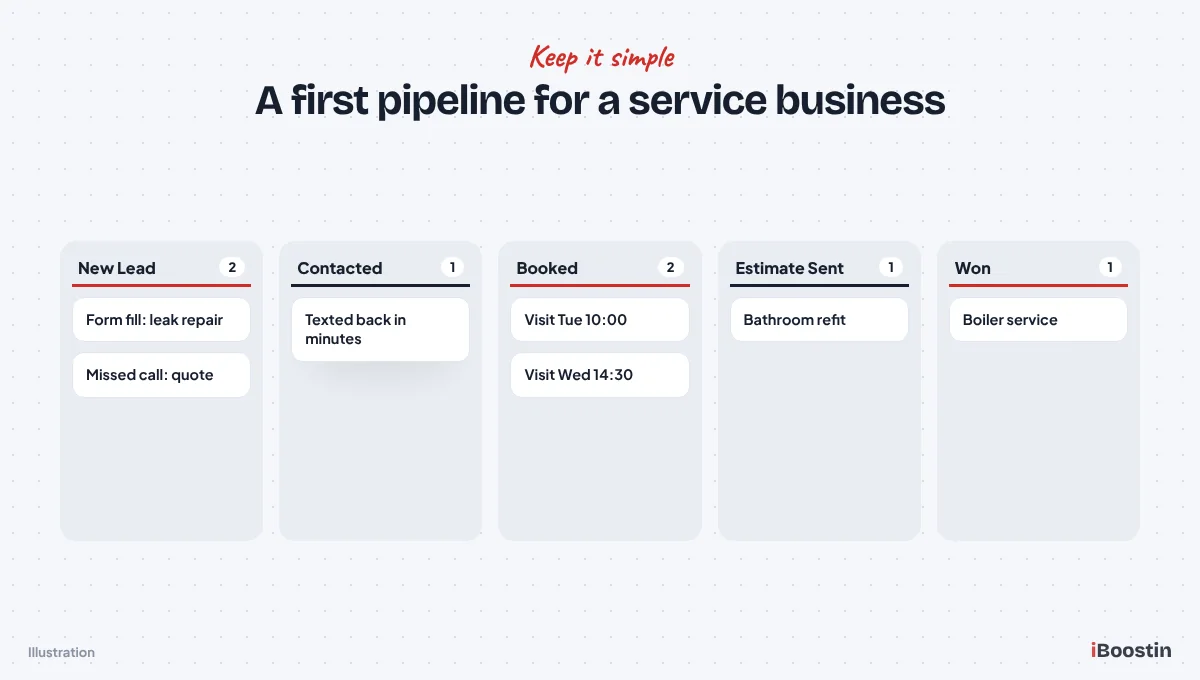
A pipeline is your sales process drawn as columns. Each lead becomes an opportunity card that moves from stage to stage. The test of a good pipeline is simple: every stage should be a real step a lead takes, and each stage should either trigger an action or tell a person what to do next. Stages that nobody acts on just collect dust.
Go to Opportunities, then Pipelines, then Create New Pipeline. Start with five to seven stages. A home services business might use New Lead, Contacted, Appointment Booked, Estimate Sent, Won and Lost. A clinic might use New Enquiry, Booked, Showed, No Show, Treatment Plan and Won. Resist building separate pipelines for every service on day one. One clear pipeline is easier to automate and report on.
- Go to Opportunities, then Pipelines.
- Click Create New Pipeline and name it.
- Add stages in the order a lead moves through them.
- Save, then create one test opportunity and drag it through each stage.
- Add opportunity custom fields you need, such as job value or service type.
Step 14: Create calendars and reminders
Calendars are created under Calendars, then Calendar Settings, then New Calendar. Pick the type that matches how you book. Personal Booking suits one person taking one-on-one appointments. Round Robin spreads bookings across a team. Class Booking handles group sessions, and Collective Booking needs several people free at the same time. The list of types varies a little between accounts, so pick the simplest one that fits.
Settings are grouped into Basic details, Staff and location, Availability, Booking rules and Advanced settings. Set realistic availability, add buffer time between appointments, set a minimum notice so nobody books ten minutes from now, and limit how far ahead people can book. For reminders, choose one place to send them: the calendar’s own notification options or a workflow. If you use both, leads get duplicate messages. We build reminders as a workflow, covered below, because it gives more control. For a deeper build, see our GoHighLevel calendar booking setup page.
- Go to Calendars, then Calendar Settings, then New Calendar.
- Choose the calendar type and assign the team members.
- Set availability, appointment length, buffers, minimum notice and booking window.
- Under Advanced settings, set the form and the confirmation page.
- Book a test appointment yourself and check it appears in your synced Google or Outlook calendar.
Step 15: Build your first form or survey
Forms and surveys are how most leads enter the account. Build them under Sites, then Forms (or Surveys for multi-step questions). Keep the first form short: name, phone, email, the one or two questions you really need, and a consent checkbox for texting. Every extra field lowers completion, so collect the rest later in a conversation or a follow-up form.
Map each question to a custom field you created in Phase 4, so answers land in the right place. Add your SMS consent wording near the phone field, because A2P reviewers look at how phone numbers are collected. Set what happens after submission, either a thank you message or a redirect to your booking calendar. Sending people straight to the calendar while they are still interested is one of the easiest wins in any build.
- Go to Sites, then Forms, then open the form builder.
- Add standard fields and your custom fields.
- Add a consent checkbox with clear SMS and email consent text.
- Set the on-submit action to a message or a redirect to your booking page.
- Submit the form yourself and check the contact record and custom fields.
Step 16: Publish a first funnel or website page
You do not need a full website on day one. You need one page that captures leads and gives the A2P reviewer a clear opt-in to look at. Build it under Sites, then Funnels (or Websites if you are building a full site), starting from a template or a blank page. Add your form or calendar, your privacy policy and terms links, and your business details in the footer.
Connect your own domain before you send traffic. Go to Settings, then Domains & URL Redirects, click Connect a domain, and point your root domain or a subdomain such as get.yourbusiness.com with the records shown. If Cloudflare runs your DNS, set the HighLevel record to DNS only. Then check the page on a phone, because most of your leads will see it there first. For bigger funnel builds, our GoHighLevel funnels service covers design and conversion work.
- Go to Sites, then Funnels, and create a new funnel.
- Pick a template or start blank, then add your form or calendar.
- Add privacy policy and terms links and your business details.
- Connect your domain under Settings, then Domains & URL Redirects.
- Preview on mobile, publish and submit a test lead from the live page.
Phase 6: How Do You Set Up Conversations, the Mobile App and Reviews?
Now the account can capture leads, so make sure your team can answer them and that happy customers get asked for a review. These three pieces are quick, but they decide how the account feels to use day to day.
Step 17: Set up the conversations inbox
The conversations inbox collects texts, emails, calls, Facebook and Instagram messages, Google messages and web chat into one thread per contact. Before launch, decide who answers what. In a small business the owner might answer everything. In a team, assign conversations to the contact’s owner so messages do not sit unread while everyone assumes someone else has it.
Save your most common replies as reusable snippets or templates (the label depends on your version), such as directions, pricing questions you answer by phone, or how to reschedule. Then send yourself a text, an email and a Facebook message, and reply to each from the inbox. That simple test catches broken channels before a real lead finds them.
Step 18: Install the LeadConnector mobile app
The mobile app is called LeadConnector, and it is available for iPhone and Android. Each user logs in with the same email they use on desktop and picks the sub-account. From the app your team can reply to messages, see contacts, check appointments, move opportunities and take calls. For owners who spend the day on job sites, this is often the difference between answering a lead in minutes and answering the next morning.
Turn on push notifications for new messages on every phone that should get them. If you want calls to ring in the app, the setting is per user: go to Settings, then My Staff or Users, edit the user, open Call and Voicemail Settings, and under Forward Calls to select the mobile app option. The number must belong to the sub-account and be assigned to that user. Then call your business number from another phone and make sure the app rings.
Step 19: Turn on review requests
Reputation management sends review requests by text or email after a customer is checked in or marked done, and lets you reply to Google reviews from HighLevel. Once Google Business Profile is connected, go to Reputation, then Settings. Confirm the Review Link points to your correct Google profile, then set up SMS Requests and Email Requests: when to send after check-in, how often to repeat until clicked, and the maximum number of retries.
Keep it polite. One request and one or two reminders is plenty. Ask every customer the same way. Google’s review policies do not allow you to selectively ask only happy customers or discourage negative reviews, so skip any setup that filters people away from Google based on a rating. Instead, make sure unhappy customers can reach a real person quickly through the same message. If your account offers Reviews AI under its reputation settings, set it to draft replies for you to approve at first, rather than posting automatically.
- Make sure Google Business Profile shows Connected.
- Go to Reputation, then Settings.
- Confirm the Review Link.
- Turn on SMS Requests and Email Requests and set the timing and retries.
- Send a request to yourself and click the link to check it opens the right profile.
What Are the First 3 Workflows to Build in GoHighLevel?
Workflows are where HighLevel starts paying for itself, but new accounts often launch with fifteen half-tested ones. Launch with three. Each covers a moment where leads are lost most often: the first minutes after an enquiry, a missed call and the hours before an appointment. Build them under Automation, then Workflows, then Create Workflow, either from scratch or from a recipe. For the full mechanics of triggers, actions and logic, see our guide on how to build workflows in GoHighLevel.
Workflow 1: Speed to lead
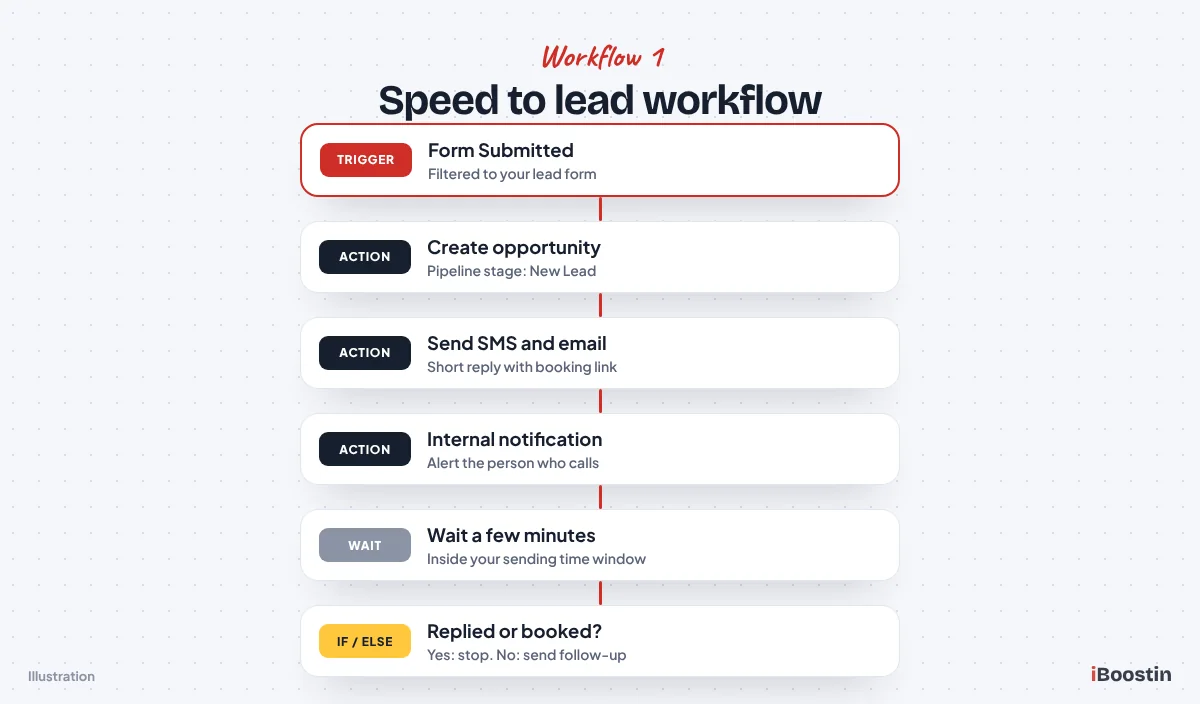
Speed to lead replies to every new enquiry within moments, while the person is still looking at their phone. The trigger is Form Submitted, filtered to your lead form (add a Facebook Lead Form Submitted trigger too if you run lead ads). The actions create or update an opportunity in the New Lead stage, send a short text, send an email with your booking link, and send an internal notification to the person who should call.
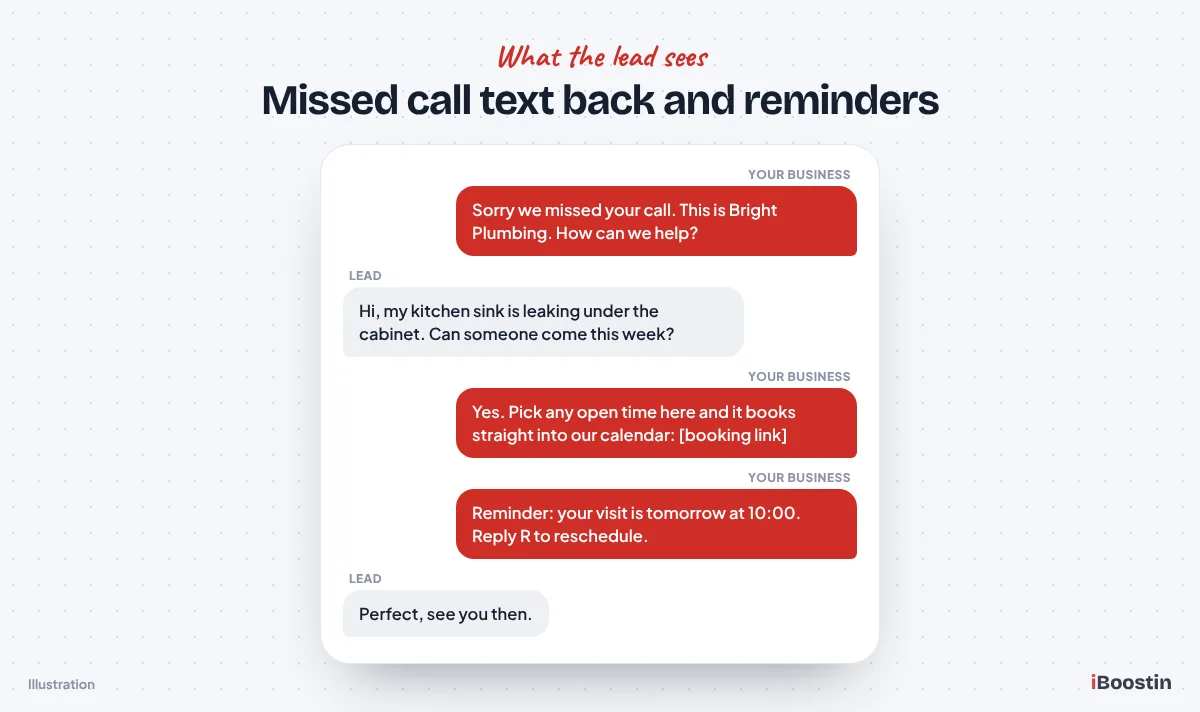
Keep the first text human and short. Something like “Hi, it’s Sam from Bright Plumbing. Got your request about the leak. Want to grab a time here, or is it easier if I call you?” with your booking link as a custom value. Add a wait step of a few minutes, then check whether they replied or booked before sending anything else. In the workflow settings, set a time window so texts go out at reasonable hours, and turn on stop on response so the automation steps back once a real conversation starts.
Workflow 2: Missed call text back
When nobody can pick up, missed call text back sends the caller a text within moments, so they do not move on to the next business on Google. Build it with the Call Status trigger, set to incoming calls with a status such as not answered, busy or voicemail. The action is a single text: “Sorry we missed your call. This is Bright Plumbing. How can we help?” Add an internal notification so someone follows up.
Some accounts also show a built-in missed call text back option inside the phone settings. Use one method, not both, or callers get two texts. Remember that this only works for calls that come through your HighLevel number, and the text only delivers if A2P is approved. Our dedicated guide to missed call text back in GoHighLevel has ready-to-use messages and the edge cases we test for.
Workflow 3: Appointment reminders
Reminders cut no-shows by keeping the appointment top of mind. The quickest start is the Appointment Confirmation + Reminder recipe, which you then edit. Otherwise, use an appointment trigger filtered to your calendar, send a confirmation right away, then add wait steps that wait until a set time before the appointment, such as one day before and one or two hours before, each followed by a short text or email.
Include the date, time, address or meeting link and an easy way to reschedule in every reminder. Pull the time from the appointment itself, not typed text, so it always matches the booking. Then add a branch for cancellations and reschedules so a lead who cancelled does not get “see you tomorrow” the next day. Once these three run cleanly, our list of GoHighLevel workflow examples gives you ideas for what to add next.
How Do You Test GoHighLevel Before Going Live?
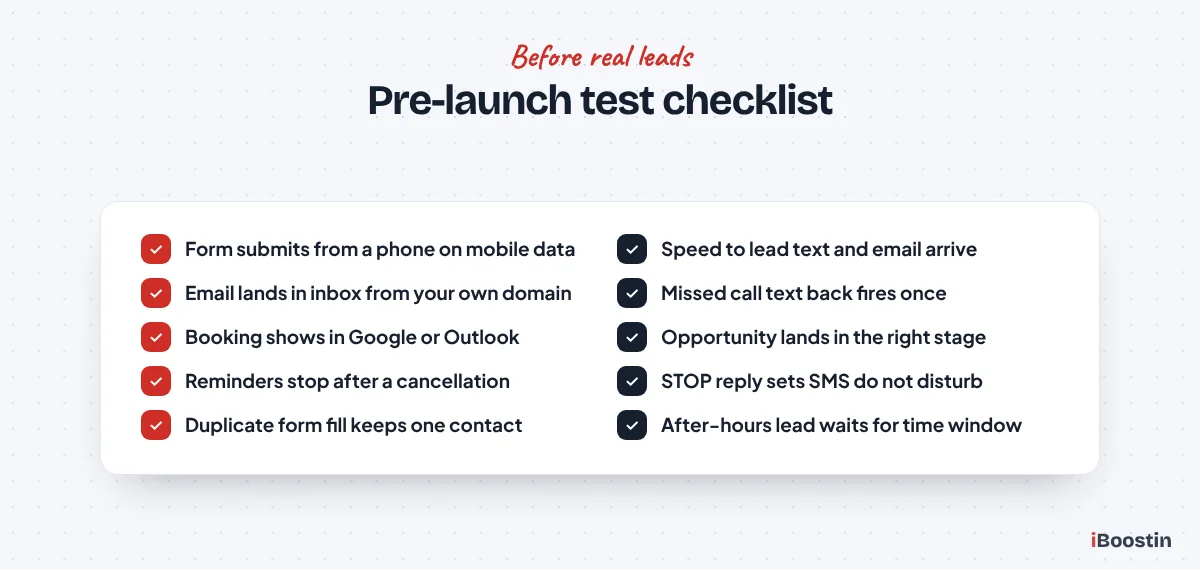
Testing is the step everyone wants to skip and the one that saves the most embarrassment. Use a test contact with your own phone and an email address you can check, and walk through every path a real lead could take. When something fails, fix it and run the whole path again, not just the broken step. Our guide to GoHighLevel workflows that are not triggering covers the most common causes if a test does nothing at all.
Test as a lead
Submit your form from the live page on your phone, using mobile data rather than office wifi. Check that the text arrives, the email lands in the inbox rather than spam or promotions, the booking link opens the right calendar and the confirmation page makes sense. Book an appointment and wait for the confirmation. Then call your business number, let it ring out and check the missed call text arrives.
Look at everything the lead sees through their eyes. Are names and custom values filled in, or does a message say “Hi ,” with a blank? Does the email show your own sending domain? Do links work on a phone? These small details decide whether a lead trusts you enough to book.
Test as the business
Now check the inside of the account. The contact should exist once, not twice, with the right tags, custom fields and source. The opportunity should be in the right stage, assigned to the right person. The internal notification should reach the right phone, and the appointment should show in the synced Google or Outlook calendar.
Open the workflow’s execution history and check each step ran in the order you expected. Reply to the test text and confirm the reply lands in the conversations inbox and the mobile app. Move the opportunity to Won and confirm any stage-based automation fires.
Test the failure cases
Real leads do not follow the happy path, so test what happens when they do not. Cancel the test appointment and check reminders stop. Reschedule it and check the new time appears in the next reminder. Reply STOP to a text and confirm the contact is marked do not disturb for SMS and gets no more texts.
Submit the same form twice with the same email and phone to check deduplication. Book outside business hours to check the time window holds texts until morning. These are the cases that cause complaints in week two, and they take minutes to test now.
What Are the Most Common GoHighLevel Setup Mistakes?
These are the problems we fix most often when businesses and agencies hand us an account that “mostly works”. Almost none of them are software bugs. They come from building in the wrong order or skipping a step that felt optional.
- Building funnels before the foundation. Pages and ads go live before the sending domain, phone number and A2P registration are ready, so the first leads get no reply at all. Do Phases 1 and 2 first, even if they feel slow.
- Leaving the time zone on the default. Reminders and workflow time windows follow the business time zone. A wrong setting sends texts at night and shows bookings at the wrong hour. Check it on day one.
- Sending email from a shared or root domain. Without a dedicated sending subdomain and SPF, DKIM and DMARC, emails drift to spam, and a bad campaign can hurt your main domain’s reputation.
- Submitting A2P before the website is ready. Missing privacy policies, missing consent wording or a legal name that does not match tax records are the usual rejection reasons. Each rejection costs more days than preparing properly.
- Tag sprawl and missing custom fields. Dozens of near-duplicate tags and answers stored in notes make reporting and automation impossible. Agree on a naming system before building.
- Running a snapshot without editing it. Snapshots bring in other people’s workflows, message copy, calendars and custom values. Unedited, they send the wrong business name, the wrong links and the wrong times.
- Too many workflows at launch. Fifteen untested automations overlap and send leads three texts at once. Launch with three, then add one at a time.
- Giving everyone admin or agency access. Staff with access they do not need can delete pipelines, change settings or see other clients. Use roles, permissions and Only Assigned Data.
- Skipping two-way calendar sync. Without it, people book times you are already busy, and you find out when two customers turn up together.
- Never testing as a lead. The builder shows a workflow as published, but only a real test from a phone shows what the lead actually gets.
Should You Set Up GoHighLevel Yourself or Get Help?
You can set up GoHighLevel yourself. Everything in this guide is doable by an owner who is comfortable with software and willing to spend a few focused sessions on it. DIY makes sense when you have time, a simple sales process, one location and no leads waiting yet. You will also understand your account deeply, which helps when you want to change something later.
Getting help makes sense when leads are already coming in, when you have a team or several locations, when your A2P registration has been rejected, or when you are an agency that needs the same quality build for every client. A done-for-you GoHighLevel setup runs the build while carrier review is in progress, so you are not waiting on one step before starting the next. If you need ongoing help after launch, a GoHighLevel expert can maintain and extend the account as your business grows.
| Set it up yourself | Get expert help | |
|---|---|---|
| Best for | One location, simple sales process, time to learn | Leads already flowing, teams, agencies |
| Time to launch | Several weeks of learning and testing | Usually days, plus carrier review time |
| Biggest risk | Spam, rejected A2P, untested workflows | Choosing someone who does not test or document |
| What you keep | Deep knowledge of your own account | A tested build, a handover and admin access |
If you do hire, keep admin access to your own account, ask how each workflow will be tested and ask for a written list of everything that was built. Those three things protect you whoever does the work.
Frequently Asked Questions About Setting Up GoHighLevel
How long does it take to set up GoHighLevel?
A basic setup with a business profile, pipeline, one calendar, a form and three workflows can be done in a few focused days. A complete build with a sending domain, phone numbers, integrations, a funnel and full testing usually takes one to three weeks. The longest wait is often A2P 10DLC carrier review, which is outside your control, so start it early and keep building while it is reviewed.
What should I set up first in GoHighLevel?
Start inside your sub-account with the business profile and time zone, then add your users. Next, start the two slow items: a dedicated email sending domain and your phone number with A2P 10DLC registration. While those verify, build your custom fields, tags, pipeline, calendars and forms. Leave workflows until last, because they depend on everything else being in place.
Do I need a dedicated sending domain in GoHighLevel?
You can send email without one, but we recommend it for every account. A dedicated sending subdomain lets you send from your own address, builds your own sender reputation and removes the sent via text some inboxes show. Set it up under Settings, then Email Services, then Dedicated Domain and IP, and publish the SPF and DKIM records it gives you, plus a DMARC record.
Can I use GoHighLevel without A2P 10DLC registration?
You can use most of GoHighLevel without it, including email, calendars, funnels and the pipeline. But if you text people in the United States from a local 10-digit number, carriers require A2P 10DLC registration, and unregistered texts get filtered or blocked. Toll-free numbers have their own verification process. Outside the US, texting rules differ by country, so check the Trust Center and regulatory requirements for yours.
What is the difference between custom fields and custom values?
A custom field stores information that is different for each contact or opportunity, such as service needed or budget range. A custom value stores information that is the same across the whole account, such as your booking link, review link or business address. Use custom fields to collect and filter lead data, and custom values to keep repeated details consistent in every message and page.
Should I work in the agency view or the sub-account?
Do almost everything in the sub-account. That is where contacts, conversations, pipelines, calendars, forms, funnels, phone numbers and workflows live. Use the agency view only for billing, creating sub-accounts, snapshots, white label branding and agency-level users. Even a single business using GoHighLevel for itself has an agency view with one sub-account, and the sub-account is where daily work happens.
Can I use a snapshot instead of setting up from scratch?
Yes, and agencies do it all the time, but a snapshot is a starting point, not a finished account. It copies pipelines, workflows, calendars, forms, custom fields and templates, but not contacts, phone numbers, domains or A2P registration. You still need to update custom values, message copy, calendar availability and integrations, and you should test every workflow as a lead before going live.
Get Your GoHighLevel Account Working From Day One
Setting up GoHighLevel well is less about knowing every feature and more about doing the right things in the right order. Lay the foundation, start the slow approvals early, organize your data, build the lead path, then add three tested workflows. That sequence turns an empty account into a system that answers every lead, books appointments and asks for reviews without someone watching it all day.
If you would rather spend that time running your business, the iBoostin team builds GoHighLevel accounts in exactly this order, tests every path as a real lead and hands it over with documentation. Either way, use the checklist above and you will avoid the mistakes that cost most new accounts their first month of leads.