In this guide
- Which Ways Can You Accept bKash in WooCommerce?
- What You Need Before You Start
- How to Set Up the bKash Payment Gateway in WooCommerce
- How to Add Nagad Payment to WooCommerce
- How to Use a Payment Aggregator Instead
- How to Set Up a Manual bKash and Nagad Method
- Do Not Forget Cash on Delivery
- Keeping Your Payment Setup Safe and Working
- Which Payment Setup Should Your Shop Use?
- Setting It Up Yourself vs Getting Help
- Frequently Asked Questions About bKash and Nagad in WooCommerce
- Give Your Buyers the Payment Option They Trust
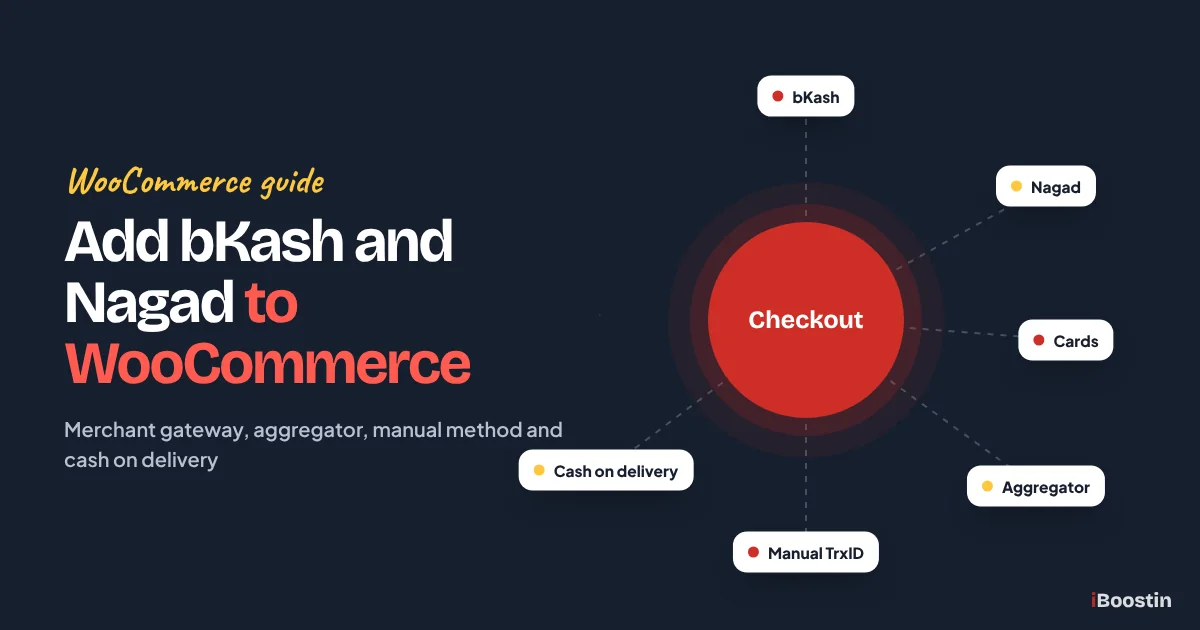
To add bKash payment to WooCommerce, you either connect the bKash payment gateway with a bKash merchant account and API credentials, use a payment aggregator that includes bKash and Nagad in one checkout, or add a manual method where buyers send money and enter the transaction ID. The right choice depends on your order volume and paperwork.
Most shop owners in Bangladesh reach this question the hard way. The store is built, the products look good, and then the first real buyer asks, “Can I pay with bKash?” Cash on delivery works, but returned parcels and fake orders eat into the margin. Card payments alone miss a large part of the market. Without bKash and Nagad at checkout, many buyers simply leave.
This guide walks you through every practical way to add bKash and Nagad to a WooCommerce store: the official merchant gateway, payment aggregators, manual transaction ID methods and cash on delivery. It covers what you need before you start, the exact settings screens in WordPress, how to test with a real order and the mistakes that cause failed payments. If your store is not built yet, start with our guide on how to create a website in WordPress.
Key takeaways
- There are three main ways to take bKash and Nagad in WooCommerce: a direct merchant gateway, a payment aggregator and a manual transaction ID method.
- A direct bKash gateway needs an active bKash merchant wallet and API credentials, and a Nagad gateway needs a Nagad merchant account and keys.
- A payment aggregator can add cards, bKash, Nagad and other wallets through one integration, after its own merchant approval.
- Manual methods work without a merchant account, but every order has to be checked by hand, so they suit low order volumes.
- Always test in sandbox mode first and then with one small real order before you announce the new payment option.
Which Ways Can You Accept bKash in WooCommerce?
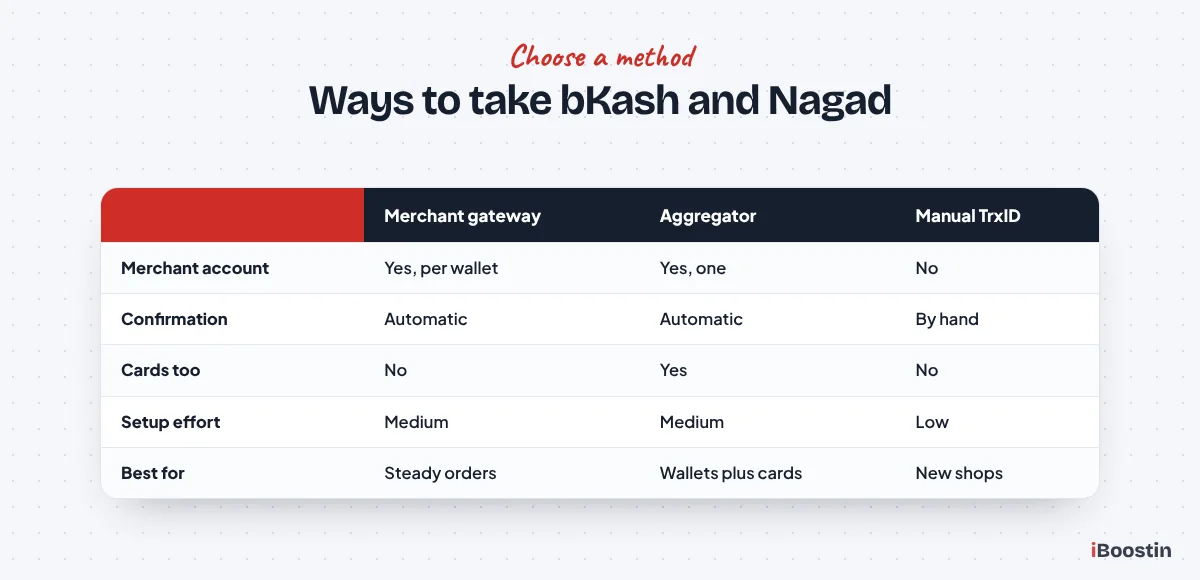
Before you install anything, decide which method fits your shop. Each one works, but they suit different stages of a business. The table below compares them side by side.
| Method | Merchant account needed | Payment confirmed | Best for |
|---|---|---|---|
| Direct bKash gateway | Yes, bKash merchant wallet | Automatically | Shops with steady daily orders |
| Direct Nagad gateway | Yes, Nagad merchant account | Automatically | Shops whose buyers prefer Nagad |
| Payment aggregator | Yes, with the aggregator | Automatically | Shops that want cards and wallets together |
| Manual transaction ID | No | By hand, per order | New shops with few orders |
| Cash on delivery | No | On delivery | Every shop, as a backup option |
Most growing stores end up using two or three of these together: an automatic gateway or aggregator as the main option, cash on delivery for buyers who prefer it and sometimes a manual method during the weeks while merchant approval is pending.
Direct Merchant Gateway
A direct gateway connects your store straight to bKash or Nagad. When a buyer chooses bKash at checkout, they complete the payment inside a bKash screen, and WooCommerce receives the confirmation automatically. The order moves to processing without anyone checking a phone.
The trade-off is paperwork. You need an approved merchant account with each provider and a separate integration for each one. For a shop that wants both bKash and Nagad, that means two applications, two sets of credentials and two plugins to keep updated.
Payment Aggregator
An aggregator is a company that connects many payment methods through one integration. A single checkout can offer cards, bKash, Nagad, Rocket and internet banking, and the money is settled to your bank account. In Bangladesh, SSLCommerz is the best-known example, and others work in a similar way.
You still need approval, but only once, with the aggregator. For many shops this is simpler than dealing with each wallet separately, especially when you also want card payments. Fees and settlement times differ between aggregators, so compare their current terms before you apply.
Manual Transaction ID Method
With a manual method, the checkout shows your bKash or Nagad number. The buyer sends the money from their app, then types the transaction ID and their sending number into the checkout form. You check your wallet, match the transaction and mark the order as paid.
This works without any merchant approval, which is why so many f-commerce sellers use it. The weakness is that every order needs a manual check, mistakes happen and buyers sometimes enter a wrong or fake transaction ID. It is a fine starting point but hard to scale beyond a modest number of orders a day.
What You Need Before You Start
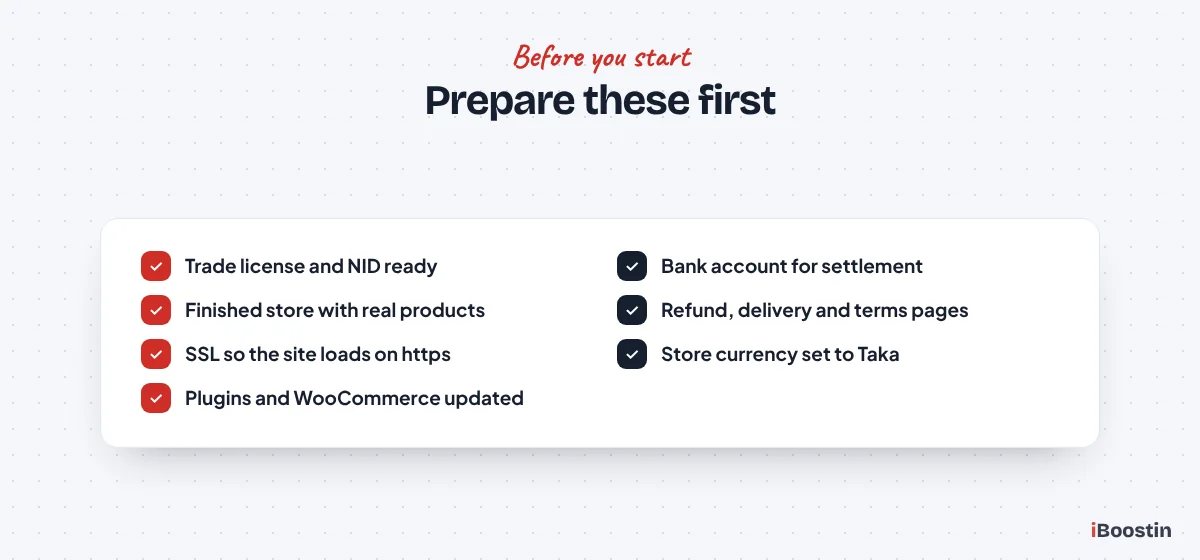
Whichever method you choose, prepare these items first. Missing paperwork or a technical gap is the most common reason the setup stalls halfway.
Business Documents for Merchant Approval
Merchant accounts and aggregators review your business before they approve you. Expect to be asked for documents such as a trade license, the owner’s NID, bank account details and information about your website and what you sell. Requirements change from time to time, so check the current list with each provider before you apply.
Your website also needs to look like a real, finished store when it is reviewed. Clear product pages with prices, a contact page, a refund and return policy, delivery information and terms and conditions all help. Applications for half-built sites with placeholder text are often delayed or rejected.
A WooCommerce Store That Is Ready
On the technical side, you need WordPress and WooCommerce up to date, an SSL certificate so the site loads on https, and permalinks set to a readable format so payment callbacks reach the right address. Most payment plugins list minimum versions of WordPress, WooCommerce and PHP, so check that your hosting meets them.
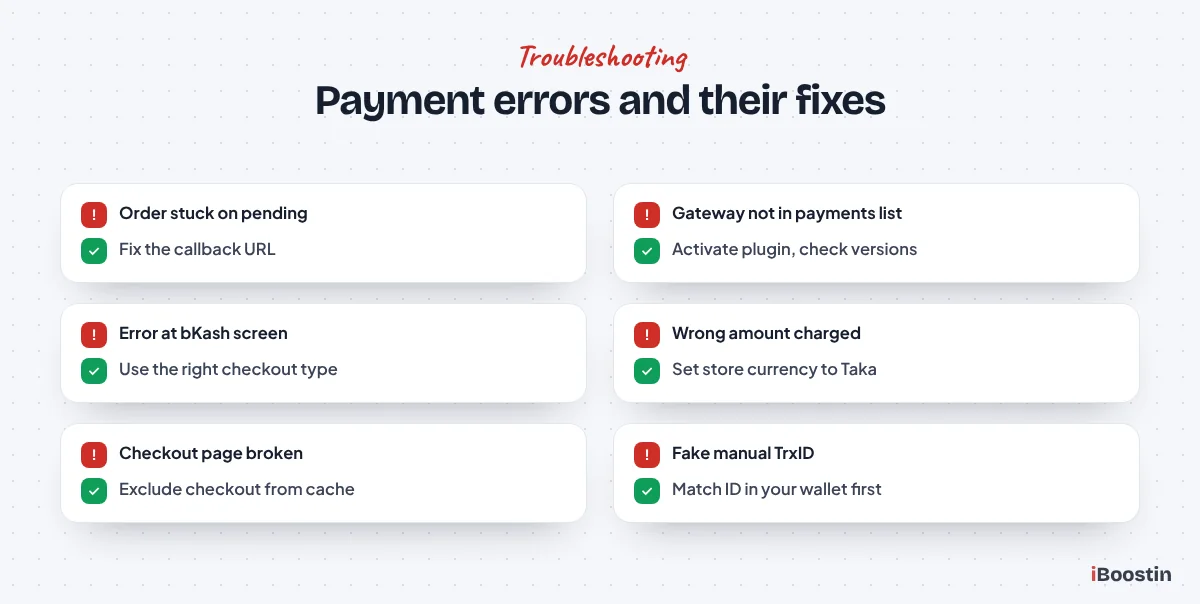
Set your store currency to Bangladeshi Taka in WooCommerce, Settings, General. Some gateways only accept Taka, and a mismatch between store currency and gateway currency is a common cause of failed or wrongly charged payments.
How to Set Up the bKash Payment Gateway in WooCommerce
This is the path for shops with a bKash merchant account. The steps below follow the official plugin that bKash publishes on WordPress.org, and other bKash gateway plugins follow a very similar flow.
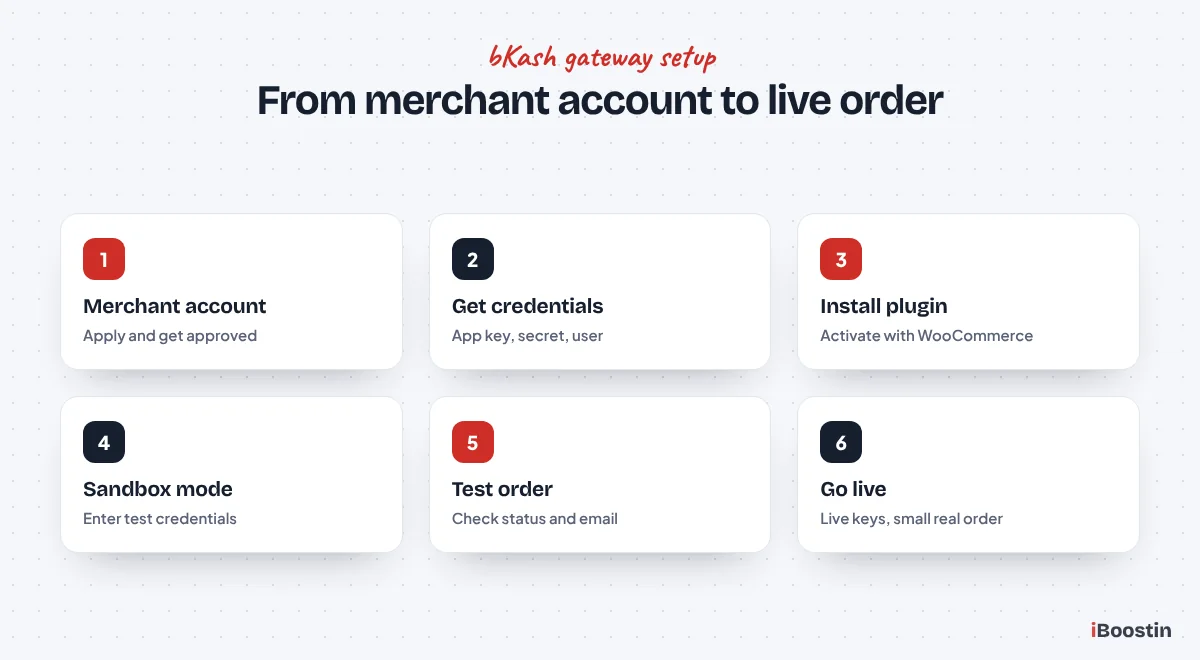
Step 1: Get Your bKash Merchant Account and Credentials
Apply for a bKash merchant account for online payments and ask for payment gateway access. Once approved, bKash provides the credentials your website needs. These usually include an app key, an app secret, a username and a password, with one set for sandbox testing and another for live payments.
Keep these credentials private. Store them in a password manager, not in a chat or an email thread that many people can see. Anyone with these details could interfere with your payments, so share them only with the developer who sets up the gateway.
Step 2: Install and Activate the Plugin
In your WordPress dashboard, go to Plugins, Add New, search for the bKash gateway plugin, install it and click Activate. Make sure WooCommerce is already active, because the plugin depends on it.
After activation, open WooCommerce, Settings, Payments. You should now see bKash in the list of payment methods. If it does not appear, check that the plugin is active and that your WordPress, WooCommerce and PHP versions meet its requirements.
Step 3: Enter Your Credentials in Sandbox Mode
Click bKash in the payments list to open its settings. Turn on sandbox or test mode first, then paste your sandbox app key, app secret, username and password. Choose the checkout type your account supports, such as regular checkout or tokenized checkout, and save the settings.
Tokenized checkout lets returning buyers pay faster, because they can link their bKash account to your store. Regular checkout asks for the account number, verification code and PIN each time. Use the type bKash has enabled for your merchant account, because choosing the wrong one causes errors at checkout.
Step 4: Test, Then Switch to Live
Place a test order in sandbox mode and complete the payment with the sandbox details bKash provides. Check that the order moves to processing, that the confirmation email arrives and that the payment appears in the plugin’s transaction list.
When the sandbox test passes, switch off sandbox mode, enter your live credentials and save. Then place one small real order with your own bKash account, confirm it reaches your merchant wallet and refund it from the order screen if the plugin supports refunds. Only then announce bKash payment to your buyers.
How to Add Nagad Payment to WooCommerce
Nagad works in a similar way, but its setup uses keys and a callback address instead of an app key and secret. Read each step carefully, because a missing key or callback is the usual reason Nagad payments fail.
Step 1: Get Your Nagad Merchant Account
Apply for a Nagad merchant account for online payments. Once approved, you get access to the Nagad merchant panel, where you generate the keys your website needs. From the merchant integration area you download your merchant private key, your merchant public key and the Nagad gateway server public key, and note your merchant ID.
Store these keys safely. The private key in particular must never be shared publicly or posted in a support forum. If you think it has been exposed, generate new keys from the merchant panel and update your website.
Step 2: Install the Plugin and Enter the Keys
Install and activate a Nagad gateway plugin from Plugins, Add New, with WooCommerce already active. Then go to WooCommerce, Settings, Payments and open the Nagad settings. Enter your merchant ID, your merchant private key and the Nagad gateway server public key, then save.
Many Nagad plugins show a callback URL after you save the form. Copy it exactly. This is the address Nagad uses to tell your store that a payment succeeded.
Step 3: Add the Callback URL in the Merchant Panel
Go back to the Nagad merchant panel and add the callback URL in the merchant integration settings, along with your merchant public key if the panel asks for it. Nagad needs to whitelist this address on its side, so ask Nagad support to confirm it if payments do not complete.
A wrong or missing callback is the most common Nagad problem we fix. The buyer pays, the money arrives in your merchant account, but the order stays on pending payment because the confirmation never reached WooCommerce. Check this first whenever orders get stuck.
Step 4: Test With a Real Order
As with bKash, test in sandbox mode if your plugin and account support it, then switch to live and place one small real order. Confirm the order status changes automatically, the email arrives and the payment shows in your Nagad merchant panel.
Test on a phone as well as a computer. Most buyers in Bangladesh pay from their phones, and the payment screen should open cleanly and return the buyer to your thank you page after payment.
How to Use a Payment Aggregator Instead
If you want cards, bKash, Nagad and other wallets together, an aggregator is often the simplest path. The setup is similar across providers.
Apply and Get Your Store Credentials
Sign up with the aggregator, verify your email and complete your business profile with the documents they ask for, such as a trade license, NID and bank details. You will usually get sandbox credentials right away and live credentials after your business and website are approved.
For SSLCommerz, the credentials are a store ID and a store password. Other aggregators use similar keys. The aggregator also asks for your settlement bank account, which is where payments arrive after their processing time.
Install the Plugin and Connect
Install the aggregator’s WooCommerce plugin, activate it and open its settings under WooCommerce, Settings, Payments. Enter your sandbox store ID and password, choose test mode and save. Many aggregators also ask you to set an IPN or webhook address in their merchant panel so your store receives payment confirmations.
Place a sandbox order, choose bKash or Nagad on the aggregator’s payment page and complete the test. When everything works, switch to live credentials, test again with a small real payment and check that the settlement appears in your merchant panel.
How to Set Up a Manual bKash and Nagad Method
If you do not have a merchant account yet, a manual method lets you start taking mobile payments today. Set it up carefully, because the manual checks are where mistakes happen.
Install a Manual Payment Plugin
Several free plugins add bKash, Nagad and Rocket as manual payment options. After installing one, go to WooCommerce, Settings, Payments, enable each wallet you want and enter the number buyers should send money to. Add clear instructions that tell buyers to send the exact order total and then enter the transaction ID and their sending number.
Check with your wallet provider whether your number type can be used for business payments, and use a dedicated number for the shop rather than your personal one. That keeps shop money separate and makes daily checks much easier.
Check Every Order Before Shipping
Every manual order arrives as on hold or pending. Before you ship, open your wallet, find the transaction ID, confirm the amount matches the order total exactly and only then mark the order as processing. Never ship based on a screenshot, because screenshots are easy to fake.
Set a fixed time each day to check payments, and ask one person to own the task. When order volume grows to the point where these checks take real time every day, that is the signal to apply for a merchant gateway or aggregator.
Write Clear Payment Instructions
Manual payments fail most often because buyers do not know exactly what to do. Spell it out in short steps at checkout: open your bKash or Nagad app, choose Send Money or Payment as instructed, enter the shop number, send the exact order total, then copy the transaction ID into the box below. Add the same steps to the order confirmation email.
Tell buyers what happens next, too. A line such as “We confirm your payment and pack your order within a few hours” removes doubt and reduces messages asking whether the payment arrived. Clear instructions mean fewer mistakes for you and more confidence for the buyer.
Do Not Forget Cash on Delivery
Even with bKash and Nagad live, many buyers in Bangladesh still prefer to pay when the parcel arrives. Cash on delivery stays an important option for most shops.
Enabling Cash on Delivery
Cash on delivery is built into WooCommerce. Go to WooCommerce, Settings, Payments, enable Cash on delivery and write clear instructions about how payment works when the parcel arrives. You can limit it to certain shipping methods, for example only inside Dhaka, if delivery partners outside the city work differently.
Set delivery charges in WooCommerce, Settings, Shipping, with separate zones for inside and outside Dhaka. Showing the delivery charge clearly before checkout reduces abandoned carts and phone calls asking about it.
Reducing Fake and Returned COD Orders
Fake orders and refused parcels are the main cost of cash on delivery. Many shops reduce this by asking for a small advance delivery charge through bKash or Nagad for first-time buyers, or by confirming large orders by phone before shipping.
A clear product page also helps. When buyers see real photos, sizes, delivery time and return policy before ordering, fewer change their mind at the door. Payment setup and good product pages work together.
Keeping Your Payment Setup Safe and Working
Payment plugins handle money, so they need regular care. A broken checkout during a sale costs more than any monthly maintenance fee.
Update Plugins and Watch for Conflicts
Keep WordPress, WooCommerce and every payment plugin updated, and test checkout after each update. Payment providers change their systems from time to time, and an outdated plugin can stop working without warning. Take a backup before updates so you can roll back if something breaks.
Plugin conflicts are common when several payment, caching or security plugins are installed together. Caching in particular can break checkout pages, so make sure your cache plugin excludes the cart, checkout and account pages.
Protect Your Admin and Credentials
Use strong passwords and two-factor login for every WordPress admin account, and remove admin access from anyone who no longer needs it. If someone gets into your admin area, they can change payment settings or the manual wallet number shown to buyers.
If your site ever shows signs of a hack, such as strange admin users, redirects or a changed wallet number, act at once. Our guide on what to do when a WordPress site is hacked covers the first steps.
Which Payment Setup Should Your Shop Use?
There is no single right answer, but the stage of your business usually points to one. These are the setups we recommend most often to shops in Bangladesh.
A New Shop With a Few Orders a Day
If you are just moving from Facebook selling to your own store, start simple. Turn on cash on delivery, add a manual bKash and Nagad method with a dedicated shop number and write clear instructions at checkout. This lets you take payments from day one while your merchant application is in progress.
Keep a simple daily routine for checking manual payments, and track how many orders arrive each day. Once you are checking payments several times a day or making mistakes because of volume, it is time to move to an automatic gateway or aggregator.
A Growing Shop With Steady Daily Orders
When orders arrive every day, automatic confirmation saves hours and removes the risk of fake transaction IDs. Apply for a bKash merchant gateway first if most of your buyers use bKash, then add Nagad. If you also want card payments, an aggregator that covers all three may be the faster route.
Keep cash on delivery switched on during this stage. Many repeat buyers will move to mobile payment once they trust your shop, but first-time buyers often still want to pay on delivery. Watching which payment method each order uses in WooCommerce shows you how your buyers prefer to pay.
A Store That Also Sells to Buyers Abroad
If you sell to buyers outside Bangladesh as well, you need card payments and possibly international gateways alongside bKash and Nagad. An aggregator that supports international cards is usually the simplest local option, and some stores add a separate international gateway for foreign currencies.
Plan your currency settings carefully in this case. Local wallets work in Taka, so a multi-currency store needs settings that show buyers the right currency without breaking the local gateways. Test every combination of currency and payment method before launch.
Refunds and Order Status
Whichever setup you choose, decide how refunds will work before your first sale. Some gateway plugins let you refund directly from the WooCommerce order screen, which sends the money back automatically. With manual methods, you send the refund from your wallet yourself and add a note to the order.
Also check how each method sets the order status. Automatic gateways usually move paid orders to processing, while manual methods leave them on hold until you confirm. Make sure your team knows which statuses mean “ready to pack” so nothing ships before payment is confirmed.
Setting It Up Yourself vs Getting Help
You can set up most of this yourself if you are comfortable in WordPress. A manual method and cash on delivery take an hour or two. A direct gateway or aggregator takes longer, mainly because of the merchant application, but the plugin setup itself follows the steps above.
Getting help makes sense when payments keep failing, when callbacks or keys are confusing, when you need several gateways working together or when the store is already busy and you cannot risk a broken checkout. Our WooCommerce development team sets up and tests local payments, and our WordPress development company in Bangladesh builds complete stores with bKash, Nagad, cards and cash on delivery ready from launch. If you are still choosing a platform, our WordPress vs Shopify comparison explains why most Bangladeshi stores choose WooCommerce, and our guide to WordPress website cost in Bangladesh shows what a store costs to build and run.
Frequently Asked Questions About bKash and Nagad in WooCommerce
Can I add bKash to WooCommerce without a merchant account?
Yes, with a manual payment plugin. Buyers send money to your number and enter the transaction ID at checkout, and you confirm each payment by hand. For automatic confirmation you need a bKash merchant account or an aggregator that includes bKash.
Is there an official bKash plugin for WooCommerce?
Yes. bKash publishes a WooCommerce plugin on WordPress.org that supports regular and tokenized checkout, sandbox and production modes, refunds and webhooks. It needs an active bKash merchant wallet and payment gateway credentials from bKash.
What credentials do I need for the bKash payment gateway?
You usually need an app key, an app secret, a username and a password from bKash, with separate sets for sandbox testing and live payments. bKash provides these after your merchant account and payment gateway access are approved.
Why is my Nagad payment stuck on pending?
The most common cause is a missing or wrong callback URL in the Nagad merchant panel, so the payment confirmation never reaches WooCommerce. Check the callback address, confirm Nagad has whitelisted it and make sure your keys and merchant ID are entered correctly.
Can one plugin handle bKash, Nagad and cards together?
Yes, if you use a payment aggregator such as SSLCommerz. One integration can offer cards, bKash, Nagad, Rocket and internet banking at checkout. You need a merchant account with the aggregator, and fees and settlement times depend on its terms.
Should I still offer cash on delivery?
For most shops in Bangladesh, yes. Many buyers still prefer to pay on delivery, especially for a first order. Keep cash on delivery as an option, show delivery charges clearly and consider a small advance for first-time buyers to reduce fake orders.
How do I test bKash payments before going live?
Turn on sandbox mode in the plugin, enter your sandbox credentials and place a test order. Then switch to live credentials, place one small real order with your own account, check the order status and payment, and refund it if your plugin supports refunds.
Give Your Buyers the Payment Option They Trust
Adding bKash and Nagad to WooCommerce is one of the quickest ways to turn visitors into paid orders in Bangladesh. Start with the method that matches your stage: manual payments and cash on delivery while you are small, then a merchant gateway or aggregator when orders grow. Test every option with a real order before you tell buyers about it.
Once payments work, keep the plugins updated and check the checkout after every change. If you would rather have the whole setup done and tested for you, our team builds and maintains WooCommerce stores for businesses across Bangladesh.